StarCCM+
Configure and submit StarCCM+ computational fluid dynamics simulation jobs.
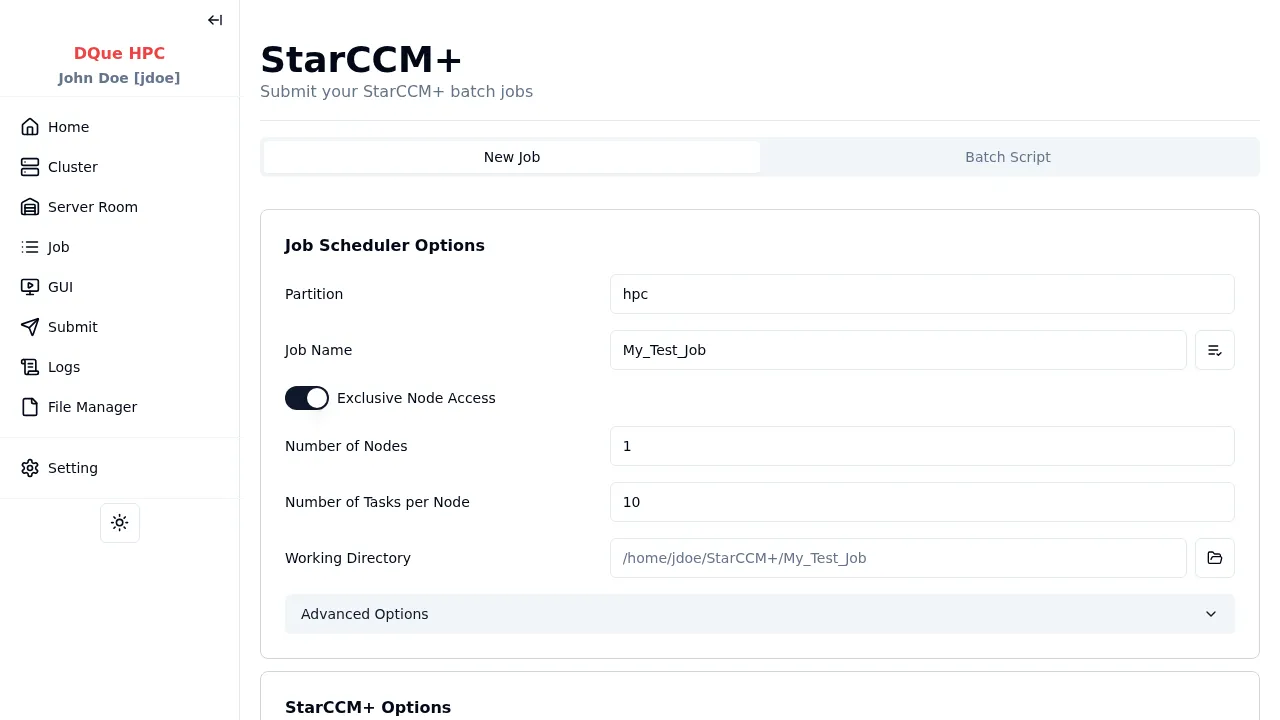
Step 1: Job Scheduler Options
Section titled “Step 1: Job Scheduler Options”This app promotes multi-node fields to the basic section:
- Partition — select the partition (e.g.,
hpc). - Job Name — assign a name (e.g.,
My_Test_Job). - Exclusive Node Access — typically enabled for MPI jobs.
- Number of Nodes — specify the number of compute nodes required.
- Number of Tasks per Node — specify the number of StarCCM+ processes per node.
- GPU Model / GPUs per Node — select if the simulation uses GPU acceleration.
- Working Directory — where simulation files are read from and outputs are written to.
Step 2: StarCCM+ Options
Section titled “Step 2: StarCCM+ Options”| Field | Description |
|---|---|
| Version | StarCCM+ version (e.g., 16.04.007) |
| License Type | Flex Server (Pod Key) or Local Server |
| Flex Server | FlexNet license server address (required for Flex mode) |
| Pod Key | Power-on-Demand license key (required for Flex mode) |
| Local Server | Local license server address (for Local mode) |
| Use Intel MPI | Enable Intel MPI instead of default |
| Enable GUI Collaboration | Allow other users to connect to the running simulation GUI |
Step 3: StarCCM+ Job Files
Section titled “Step 3: StarCCM+ Job Files”| Field | Description |
|---|---|
| Sim File | Path to the .sim simulation file (required). Use the Select button to browse. |
| Java Runner | Optional .java macro file. Use the Select button to browse, or choose the Default Java Runner preset if configured by your admin. |
Step 4: Submit
Section titled “Step 4: Submit”Click Submit to send the batch job to the SLURM scheduler. The StarCCM+ solver runs headlessly on the allocated nodes.
Connecting to the StarCCM+ GUI
Section titled “Connecting to the StarCCM+ GUI”StarCCM+ uses a two-stage workflow — the solver runs as a headless batch job, and you connect a GUI client separately:
- Wait for the batch job to reach RUNNING state (check on Job Monitor).
- Navigate to the GUI Sessions page.
- Find your StarCCM+ job under StarCCM+ Jobs and click Start StarCCM+ GUI.
- A VNC-based GUI client launches and connects to the running batch solver.
- Click Connect to open the StarCCM+ GUI in your browser through noVNC.